

What Is Illuminance Uniformity? Why Isn't Denser Fixture Spacing Always Better?
When choosing lighting, most people's first instinct is "higher wattage means brighter" or "more fixtures packed closer together means better coverage." But anyone who's actually done lighting design knows that bright doesn't mean good - uniformity is the real core metric of lighting quality. Today let's talk about a concept that's often overlooked but absolutely critical: illuminance uniformity.
What Exactly Is Illuminance Uniformity?
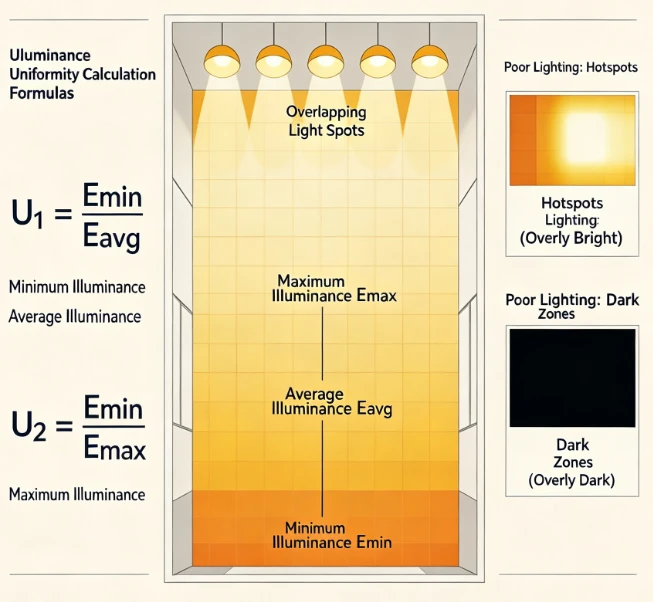
Simply put, illuminance uniformity measures how evenly light is distributed across a space. It's typically calculated two ways:
- U1 = Minimum illuminance / Average illuminance (Emin / Eavg)
- U2 = Minimum illuminance / Maximum illuminance (Emin / Emax)
Here's an example: if a poultry house has an average illuminance of 30 lx, but one corner drops to just 8 lx while the area directly under a fixture spikes to 60 lx, that house has very poor uniformity - even though the "average" looks perfectly on spec, the actual experience is patchy, with bright and dim zones everywhere.
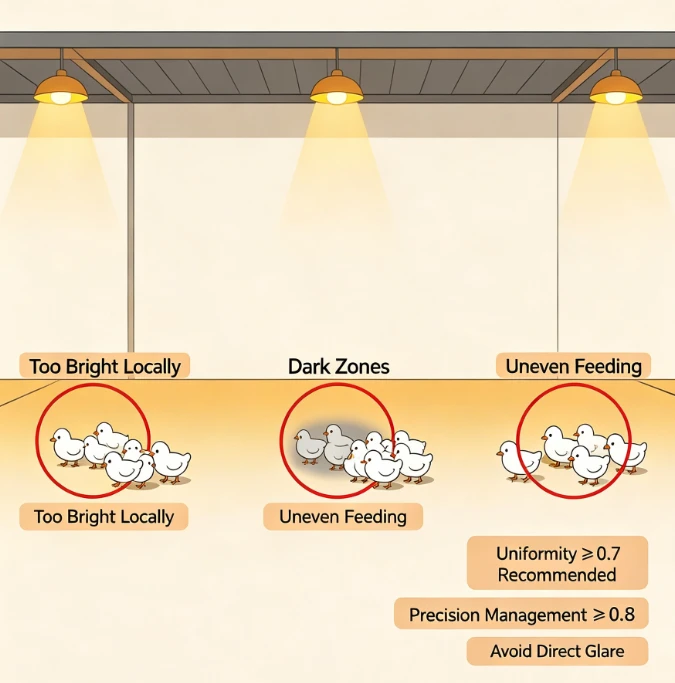
For human workspaces, uniformity typically needs to reach U1 ≥ 0.6. For livestock settings (layer or broiler houses), the industry generally recommends a minimum of 0.7, and some fine-tuned management scenarios call for 0.8 or higher - because animals are often far more sensitive to lighting variation than we assume. Uneven lighting can cause flocks to cluster in certain areas, uneven feeding, and heightened stress.
Why "Denser Is Brighter" Is a Myth
It sounds intuitive: pack the fixtures closer together, and surely the light gets more even and more abundant? In reality, it's the opposite - improper spacing (whether too dense or too sparse) actually breaks down uniformity, and over-density brings a string of hidden costs on top of that.
1. Dense Spacing Creates Both Hot Spots and Dark Zones - At the Same Time
Every fixture's light output follows a natural falloff curve - brightest directly beneath it, gradually weaker outward. If fixtures are spaced too closely, the bright cores of adjacent fixtures overlap, creating localized overexposed "hot spots" directly underneath. Meanwhile, if the fixture itself has a narrow beam angle with limited coverage, "dark bands" can still appear between fixtures. The end result: overall brightness looks high, but uniformity still fails to meet spec - and you've spent extra money on fixtures for nothing.
2. Wasted Light Output, Higher Energy Costs
The denser the fixtures, the larger the overlapping zone of luminous flux - and that overlapping light is essentially wasted, since it doesn't translate into a proportional increase in effective lit area. You might spend double the fixture budget and only gain 1.2x the effective lighting result - a sharply diminishing return on investment.
3. Glare and Animal Welfare Concerns
Overly dense fixture layouts tend to push local light intensity too high, especially in low-ceiling spaces or where fixtures are directly exposed - a recipe for glare. In livestock settings, this doesn't just affect visual comfort for staff during inspections; excessively intense direct light can also trigger stress responses, feather pecking, or even flock panic - running directly counter to the original goal of improving animal welfare.
4. What Actually Determines Uniformity: The Ratio Between Spacing and Mounting Height
In professional lighting design, there's a key parameter called the Spacing-to-Height Ratio (S/H Ratio) - the ratio between a fixture's horizontal spacing and its mounting height. This ratio, not the raw spacing number, is what actually determines uniformity.
- The higher the mounting height, the larger the coverage area of a single fixture, allowing for wider spacing;
- The lower the mounting height, the more limited a single fixture's coverage, requiring tighter spacing;
- A wider beam angle covers more area, allowing more relaxed spacing; a narrow beam angle needs denser placement to maintain uniformity.
As a general rule of thumb, keeping the S/H ratio between 1 and 1.5, combined with a well-matched beam angle, usually strikes the right balance - maintaining uniformity while keeping fixture count and cabling costs within a reasonable range. That's what true science-based "just enough, and even" lighting looks like.
So What Do You Do If Uniformity Falls Short?
Rather than blindly adding more fixtures, more effective approaches include:
- Optimize the beam angle - choose a fixture whose beam angle matches the mounting height and space width, rather than using "one fixture for everything";
- Adjust the ratio between mounting height and spacing, instead of simply shrinking spacing alone;
- Use dimming systems for localized compensation - for example, negative-feedback dimming via a light sensor can automatically brighten dark zones and tone down hot spots, letting smart control make up for the limits of physical layout;
- Make good use of reflection and diffusion - light-colored walls, ceilings, and diffusing lens designs all help redistribute light secondarily, indirectly improving uniformity without relying purely on adding more fixtures.
The Bottom Line
Lighting design was never a simple math problem of "more fixtures, more brightness, better results." It's a precision balancing act between spacing, mounting height, beam angle, and uniformity. Especially in large-area settings like poultry houses, warehouses, and factory floors, ignoring uniformity and blindly stacking fixtures doesn't just waste budget - it can create unexpected animal welfare or operational safety risks.
If you're planning the lighting layout for a project and aren't sure how to balance fixture spacing, mounting height, and beam angle to hit both uniformity targets and cost efficiency, feel free to reach out anytime - we can calculate the optimal fixture layout based on your specific space dimensions, so you spend less and get more done!


