
Overview of 4-Pin LED Wiring and Use
Concerned about wiring wires, bulbs, and 4-pin LED strips incorrectly? Having trouble making reliable solderless connections? After the installation, are you experiencing problems, like dim output, flickering, colour distortion, or no light?
Industrial indication lights, equipment wiring, store décor, and home ambience lighting all make extensive use of 4-pin RGB LED products. However, the main reasons for problems like burnout, short circuits, and frequent failures are unclear pin definitions, mismatched power settings, and wrong connection methods
The fundamentals, solder and solderless connection options, scene-based installation procedures, methodical troubleshooting, standards for accessory selection, and long-term safety maintenance are all covered in this comprehensive 4-pin LED handbook. 90% of typical 4-pin LED usage issues can be avoided by mastering standardised operation, regardless of whether you are a do-it-yourself enthusiast, an on-site installation worker, or a novice buyer.

1. 4-Pin LED Fundamentals: Study Before Using
Before you start wiring and installing, it's important to understand the different product types, what each pin does, and the basic electrical details to ensure safe and effective use. Without a fundamental understanding, blind connections can quickly cause irreversible damage to LED components.
1.1 Strip, Bulb, and Cable 4-Pin LED Application Scenarios
There are three primary types of 4-pin LED goods, which differ clearly in terms of look, structure, and use cases. Incorrect product selection and installation failure can be prevented by selecting the appropriate product based on demand.
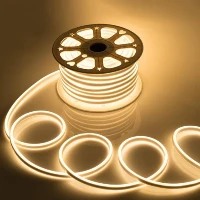
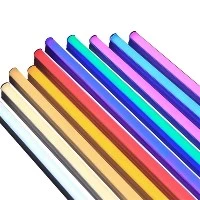
4-Pin RGB LED Strip: Long, flexible, soft, and bendable. Ideal for hidden edge lighting, mall and store window gradient lighting, cabinet design, and indoor ambient lighting. It is the most popular 4-pin LED type for civilian use and facilitates segmented installation and cutting.
Four-pin LED bulb: compact design with a fixed bayonet or screw interface. It is mostly used for tiny local fixed illumination, mechanical status alert lights, and industrial equipment indicator lights. It is easy to install and requires little upkeep.
4-Pin LED Extension Cable: An independent terminal wire layout used for power and signal transfer over extended distances. Perfect for long-distance LED scheme connections, equipment interior wiring, and cross-wall wiring.
Installation and wiring needs vary depending on the product type. Verify your product form first to increase installation stability and operational efficiency.
1.2 Definition of 4-Pin LED Pinout and Identification of Positive and Negative Polarity
The fundamental component of 4-pin LED wiring is pin recognition. The four pins have set functional divisions: V+ (Positive Power), GND (Ground), R (Red Signal), G (Green Signal), and B (Blue Signal). The majority of 4-pin RGB LEDs use the common anode architecture.
No light, colour imbalance, or chip burning are all directly caused by incorrect pin docking. For both novice and experienced users, consider these three useful identifying techniques:
Check the Specification Sheet (Most Accurate): Consult the official product documentation for pin sequence, definition, and voltage characteristics that are appropriate for engineering and formal building.
Multimeter Testing (Advanced Method): Set the multimeter's diode gear. The positive pole is the pin with a continuous conduction response, and each of the other three signal pins represents an RGB channel.
Trial Connection (Newbie Emergency): Conduct a brief trial docking under a low-voltage safe power source. Steer clear of prolonged power-on to avoid burnout.
Important reminder: Don't evaluate pins solely based on the colour of the wire. Brand-specific wire colour standards vary, but unified pin function identification is a trustworthy guideline.
1.3 4-Pin LED Core Power Matching and Parameter Specification
A hidden risk for LED burning and safety mishaps is parameter mismatch. The three primary signs that need to be verified are resistance matching, operating voltage, and current limit.
Voltage Adaptation: The two most common requirements are 12V and 24V. While 24V is appropriate for long-distance engineering wiring, 12V low-voltage LEDs are more popular for do-it-yourself projects. Never combine a 12V and a 24V power supply because low-voltage LEDs may quickly burn out due to high voltage.
Current Standard: One LED bead has a rated working current of 20 mA. To avoid overload operation, compute the total current for combined light strips in series and parallel in a reasonable manner.
Current-Limiting Resistance: Adjust the resistance based on the voltage differential. A 4-pin LED's service life can be increased, current can be stabilised, and heat generation can be decreased with a reasonable resistance setup.
Every standard 4-pin LED product satisfies UL and CE safety certification requirements. To guarantee electrical safety when matching power supplies, consult certified parameter indicators.
2. Solder vs. Solderless 4-Pin LED Connection Options
4-pin LED connections are separated into solderless rapid connections and professional welding connections based on operating skills, cost budget, and service life requirements. Based on usage conditions, you can make specific decisions.
2.1.3 Techniques for Solderless Connection: Newbie-Friendly Functionality

It is appropriate for short-term use, do-it-yourself projects at home, and non-professional personnel operation; it does not require a soldering iron or professional tools. Three options address various cost and stability requirements.
Dupont Jumper + Wire-Nut Attachment: A Dupont jumper, wire nut, and screwdriver are required tools.
Steps involved in operation: remove 5 mm of wire skin, align the butt core wires one to one, lock and secure with a wire nut, and perform a power-on test.
Advantages: Instant use, low cost, and no learning costs;
Cons: Not suitable for long-term or outdoor use, has poor stability, and is easy to lose.
Terminal Block Connection with Four Pins Tools required: a unique screwdriver and a 4-pin terminal block.
Steps involved in operation: Remove the wire, insert it into the fixed terminal, and tighten the fixing screw. Verify stiffness and detect power-on.
Advantages: Cost-effective, reusable, and stable contact; disadvantages: somewhat greater volume and unsuitable for small installation locations.
Professional Dupont connector accessories and crimping pliers are required for the Crimping Tool + Dupont Connector Kit. Steps involved in
Operation: Male and female connectors should be inserted in pairs after standard wire stripping, crimp pins, docking, and an overall test.
Advantages: Small size, robust anti-interference, appropriate for large-scale installation;
Cons: Auxiliary tools with specific learning costs must be purchased.
2.2 Welding Connection: Ideal for Stable, Long-Term Use
Welding is the most dependable connection technique for long-term fixed wiring, engineering projects, and outdoor installation because it successfully prevents improper contact and line drop-off.
Standard requirements for welding operations:
Get the tools ready: Tweezers, flux, solder wire, an electric soldering iron with a constant temperature (60W is ideal), and a high-temperature insulating sleeve.
Fundamental requirements for control: To avoid burning LED chips, the soldering iron's temperature should be kept below 300°C, with a single soldering time of no more than three seconds.
The entire procedure includes wire stripping, pin fixing, tin coating and welding, cooling and insulation wrapping, and an overall power-on examination.
Safety advice: Avoid flammable materials to reduce the risk of fire; use anti-static and anti-scald protection when welding.
2.3 Quick Selection Guide & Comparison of Connection Solutions

3. How to Install Various 4-Pin LED Products
To address scene-based installation issues, implement targeted installation based on product kinds after pin and connection schemes have been verified.
3.1 Installing a 4-Pin RGB LED Strip
The most popular 4-pin goods are LED strips. Anti-drop protection, fixed wiring, and cutting criteria are the main focuses of standard installation.
Cutting in accordance with regulations: Random cutting will harm the internal circuit; only cut following the designated cutting markings on the lamp strip.
Standard wiring: Avoid incorrect RGB signal docking and connect V+/G/R/B pins in one-to-one correspondence.
Graded fastening: Buckle and screw fixing for long-term or vibration situations; double-sided adhesive for short-distance indoor fixing.
Scene optimisation: Waterproof adhesive must be applied to outdoor lamp strips at the wiring joint; ultra-long-distance laying must take voltage drop into account and provide an additional power source.
3.2 Installing a 4-Pin LED Bulb
Installing LED bulbs is easy and accessible, with an emphasis on directional installation and power matching. To ensure safe operation, turn off the power supply first, make sure the bulb's rated voltage matches the power supply specifications, remove the outdated equipment light source, and align the bayonet or thread for locking installation. Installing directional 4-pin bulbs correctly will prevent non-lit failure since some have positive and negative pin restrictions. Turn on the power after installation to assess colour performance and brightness.
3.3 Butt Joint & 4-Pin LED Cable Extension
Standard cable extensions can successfully address voltage drops and poor contact issues when the installation distance is inadequate.
Wire gauge selection: To minimise line loss, use 0.5mm² copper wire for wiring within 5 metres and upgrade to 0.75mm² thick wire for wiring beyond 5 metres.
Butt specification: Four-core wires must be docked one to one and insulated with a heat-shrinkable tube after installation, and secondary waterproof sealing is required for outdoor joints.
Voltage drop reduction: To guarantee consistent tail LED brightness for ultra-long-distance extension, use a local power supply or thickened wire gauge.
4. Typical 4-Pin LED Diagnostics & Fixes
Following installation, high-frequency issues include colour variation, flickering, overheating, and non-lighting. Use the "simple first, complex later" principle to identify and resolve issues fast.
4.1 Logic for Systematic Troubleshooting
Overall order of inspection: Power supply power-on status → Voltage matching detection → Positive and negative pin connections → Line contact tightness → Self-inspection of LED products. Maintenance efficiency can be significantly increased by first eliminating external variables like power failure and incorrect voltage, then checking for wiring flaws and poor contact, and finally determining whether the controller and light beads are broken.
4.2 Fixes for Four Typical Errors
The LED Is Not Turning On. Fuse damage, power voltage mismatch, loose line contact, and reverse positive and negative pins are the main culprits. Rechecking V+ and GND docking, testing power output voltage, repairing wire terminals, and replacing damaged accessories are the solutions.
Unstable Brightness and Flickering The primary causes are ageing wire, inadequate power current, poor joint contact, and an unstable controller signal. Solutions include replacing the high-power matching power supply, strengthening wiring junctions, and getting rid of outdated line components.
Overheating and Unusual Heat Production Long-term overload operation, high current, inadequate heat dissipation, and improper resistance configuration are the main culprits. Reducing load power, matching accessories that limit current, and maintaining a ventilated and heat-dissipating installation environment are some solutions.
Signal line interference, aberrant controller parameters, and incorrect signal pin docking are the main reasons of colour deviation and RGB disorder. Solutions include shielding interference for long-distance signal lines, resetting the controller, and recalibrating the R/G/B pin sequence.
5. Buying Guide for 4-Pin LED Accessories
Superior matched accessories can increase service life and lower failure rates. Learn professional selection criteria to prevent wasteful and incorrect purchases.
5.1 Material and Specification Matching in Connector Selection
Pin spacing, shell material, conductivity, and waterproof grade are the key selection criteria for 4-pin connectors.
The universal standard for 4-pin LEDs is 2.54mm pin spacing, which works with the majority of lamp strips and controllers.
Material quality: IP65 and higher waterproof connectors are prioritised in outdoor situations. High-temperature-resistant PA shells adapt to complicated environments, and high-purity copper pins reduce contact resistance.
Quality certification: To guarantee compatibility and safety, give preference to goods having CE and UL certification.
5.2 Power Supply Selection: Principles of Voltage and Current Adaptation
The essential component of the energy supply is the power supply. Hidden safety risks will result from the blind quest of low prices.
Voltage unification: 12V and 24V cannot be combined, and the power supply rated voltage must be exactly the same as the LED product.
Current margin: To prevent overload protection, the power supply output current must be greater than the LED's entire operational current.
Type selection: High-precision industrial LED equipment uses a constant current power source, while lamp strips and bulbs can use a constant voltage power supply.
5.3 Essential Auxiliary Tools for Novices
Complete basic tools can enhance installation quality and lessen operating difficulty: Heat-shrinkable tube, insulating tape for joint protection, an automatic wire remover, a multispecification screwdriver set, and a multimeter for voltage and on-off detection. You can set up basic crimping tools and a soldering iron with a fixed temperature to satisfy a variety of connection requirements for long-term do-it-yourself projects.
6. Daily Maintenance & 4-Pin LED Safety Operation
For four-pin LED equipment to operate steadily over the long term, standardised operation and routine maintenance are essential.
6.1 Safety Procedures
To avoid static damage to lamp beads, all wiring and disassembly tasks must be completed while the power is off. Static electricity must be released before handling electronic components. Long-term overloading of the power supply is prohibited, and hot LED devices should not be near combustible objects. Cut off the power right away for an inspection as soon as unusual smoke and a high temperature appear.
6.2 Tips for Daily Upkeep and Service Life Extension
To prevent dust buildup that affects heat dissipation, wipe the surface dust often with a dry cloth. Every one to two months, inspect the wire joints to remove oxidation and looseness. Steer clear of frequent switching and prolonged full-brightness operation, which can significantly lessen heat loss and current impact. The total service life of 4-pin LED products can be extended by over 30% with appropriate maintenance.
7. FAQ: Common Questions Regarding 4-Pin LEDs
Q1: Would it be possible to use a four-pin LED without a professional controller?
A1: RGB gradient and colour adjustment features require a separate 4-pin controller; monochrome fixed-colour illumination can be connected straight to the power source.
Q2: Can solderless connections be used outside for extended periods of time?
A2: It is not advised to use regular terminal block connections outside; if you must, use waterproof connectors and make sure they are properly sealed and moisture-proof.
Q3: After a long-distance extension, why does the LED strip dim?
A3: Voltage drop is the cause. To balance the voltage, it is advised to either supply electricity from both ends or thicken the wire gauge.
Q4: What occurs if the positive and negative poles of a 4-pin LED are switched?
A4: Individual unprotected products will burn instantaneously upon reverse connection and power-on, and the majority of products won't light up immediately.
Q5: Does a 12V 4-pin LED require a current-limiting resistor?
A5: Discrete bulbs and bare lamp beads require a corresponding current-limiting resistor; the integrated lamp strip has one.
In conclusion
The three main components of 4-pin LED wiring and use are standardised safety operation, sensible connection scheme selection, and precise pin identification.
To successfully prevent wiring errors, frequent failures, and safety hazards, adhere to the operating procedures and selection standards in this guide, whether you're doing DIY home décor or commercial engineering installation.
Feel free to get in touch with our technical team for one-on-one expert advice and unique LED selection options if you run into complicated fault diagnosis, specialised power supply and connector matching requirements, or expert engineering scheme consulting.
https://www.benweilight.com/lighting-tube-bulb/441-v-lamp-holder-2g11-2a-500v.html