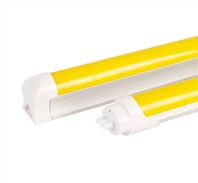
The installation method of t5 integrated LED fluorescent tube
T5 integrated LED fluorescent tube is commonly known as integrated LED fluorescent tube because the tube and bracket are integrated into one. It is usually divided into T8 integrated LED fluorescent tube and T5 integrated LED fluorescent tube. T8 integrated LED fluorescent tube has a relatively large size and emits light. The angle is also large, the T5 integrated LED tube is just the opposite.
1. Structure introduction: There are two ways of energizing. One is single-ended energization. Plug in the plug and it will light up. One is double-ended power-on. The internal AC lines are connected in parallel, equipped with connectors, so that they can be used in series.
The basic accessories are: a three-core power plug, two metal buckles for fixing the bracket, and a connecting plug for connecting the lamp tube.
2. How to connect the three wires of the plug?
Usually the two wires are from the same power source, and one wire is the ground wire. Langte noted that the yellow wire is the ground wire. So how to judge the ground wire. The ground wire is connected to the base. If it is an aluminum bracket, the ground wire will be connected to the aluminum bracket, so you can determine which ground wire is. Therefore, the authentic integrated LED tube shell is made of aluminum, one is good heat dissipation, and the other is good and safe grounding. If the two ends are conductive, the T5 integrated LED tube can be used in series, and contains a professionally designed built-in power supply, which can directly input the voltage AC220V~50Hz and install it directly.
3. Installation attention: When installing the product, cut off the power supply to avoid accidents. Non-professionals should not repair, maintain, disassemble and disassemble the lamp.
4. The biggest feature: Built-in led drive power, no need for ballast, light up when power on.
5. How to install T5 integrated led fluorescent tube?
To install the T5LED integrated bracket, first determine the installation position of the LED bracket. Generally, the house is rectangular. If you are used to installing it on the wall, you should also pay attention to the balance of the accessory installation.
First measure the distance between the two side snaps, and then use a hammer to staple the snaps into the wall. Pay attention to keeping the spring buckle horizontally and symmetrically, and snap the T5LED integrated led tube bracket into the accessory spring buckle
Hold the plastic body of the T5LED integrated bracket with your hand and hear a "click" to prove that the click is good, and install the other side in the same way. Note that you must not hold the glass directly with your hand to prevent incorrect force points from damaging the LED bracket.
6. Connect the wires to power up
Connect the two input wires of the T5LED integrated fluorescent tube bracket to the zero and live wires of the power supply respectively. After connecting the wires, you can try to power on. If everything is normal, you're done. The integration is very simple, just insert the connector (the manufacturer will provide) into the lamp holder, then connect the yellow and green wires to the ground wire, and the other two wires to the live wire and the neutral wire.
7. Matters needing attention, when used in series, according to the power of the led lamp, such as 18w, generally up to 20 lamps are connected.