
Introduction: The Logistics of High-Mast Lighting
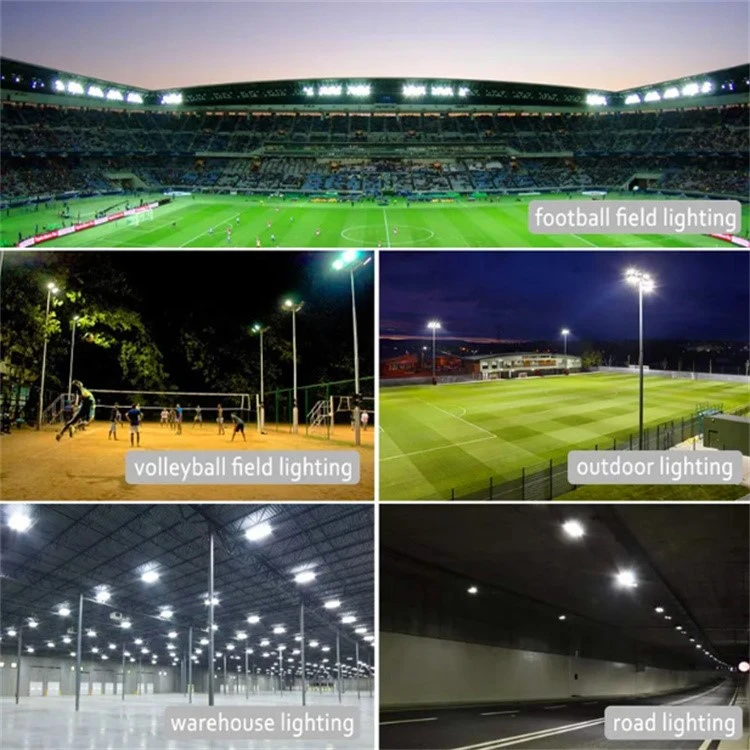
Installing lighting for large industrial warehouses, sports arenas, or public roadways is a significant capital project. While the focus is often placed on the photometric specifications of the fixture, the physical installation process dictates the timeline and initial labor costs.
The Hidden Burdens of Legacy Fixtures
Traditional High-Intensity Discharge (HID) fixtures are notoriously difficult to install. They are heavy, unbalanced, and often require specialized cranes or scissor lifts to position. More importantly, their rigid mounting brackets make precise aiming nearly impossible without time-consuming adjustments. Furthermore, making electrical connections inside a weatherproof housing often compromises the rubber seals, leading to moisture ingress and premature failure.
The Paradigm Shift: The 240W Arena Flood Light
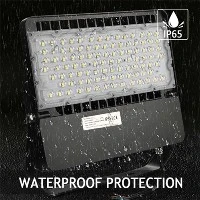
The 240W Arena LED Flood Light is engineered to eliminate these installation headaches. While it delivers an extraordinary 31,200 lumens via 392 high-lumen 3030 chips, its true genius lies in its "contractor-first" design. This guide will walk you through the entire installation process, showcasing how its heavy-duty rotatable bracket and pre-wired design drastically reduce labor time, ensuring that your high-power lighting project is completed safely, efficiently, and correctly the first time.
Pre-Installation Preparation: Understanding the Hardware
Before mounting the fixture, a thorough understanding of the physical components is required. The 240W flood light is built like a fortress, but it is designed to be highly accessible for installers.
Unboxing and Component Verification
Upon receiving the fixture, verify that all components are intact. The package will include the main aluminum alloy housing, the attached U-bracket, and the pre-wired power cable.
The Pre-Wired Cable Assembly
The fixture features a high-quality, factory-sealed power cable protruding from the bottom. Because the fixture is pre-wired, installers do not need to open the main waterproof housing to make connections. This is a massive advantage, as opening the housing in the field risks compromising the delicate internal gaskets and the IP65 rating.
The Heavy-Duty Rotatable U-Bracket
The included mounting bracket is constructed from the same high-quality, corrosion-resistant metal as the housing. It features dual heavy-duty side bolts that serve as the pivot and locking mechanism, as well as pre-drilled holes on the main crossbar for mounting to various surfaces.
Safety and Environmental Assessment
High-power lighting installation requires strict adherence to safety protocols.
Site Evaluation
Assess the mounting surface. Whether it is a concrete wall, a wooden pole, or a steel high-mast, ensure the structural integrity can support the fixture's weight and withstand high wind loads. The die-cast aluminum housing of the 240W flood light is highly rigid, but the mounting surface must be equally secure.
Electrical Safety Protocols
Always ensure the main power supply is turned off at the circuit breaker before beginning any electrical work. Confirm the power supply matches the voltage requirements of the fixture (typically 100-277V AC).
Step-by-Step Physical Installation: The Rotatable Bracket
The physical mounting process is where the contractor-friendly design of the 240W flood light truly shines.
Securing the Mounting Bracket
The U-bracket is designed to be installed first, allowing for a much lighter lift than hoisting the entire fixture at once (if desired).
Choosing the Mounting Orientation
Determine the desired mounting orientation based on your lighting layout. The bracket supports wall mounting, ceiling mounting, and pole mounting. Use the pre-drilled holes on the bracket to mark the drill points on the surface.
Drilling and Bolting
Drill the appropriate holes and use heavy-duty anchor bolts (appropriate for the surface material) to secure the bracket. Ensure the bolts are tightened securely to prevent any vibration or shifting. The structural integrity of the aluminum bracket ensures it will not warp or bend under stress.
Attaching and Adjusting the Flood Light Housing
Once the bracket is secure, the main fixture is attached to the pivot points.
The Pivot Point and Dual Locking Bolts
Loosely thread the dual side locking bolts through the housing and the bracket. Do not fully tighten them yet. This allows the fixture to pivot freely.
Aiming the 150-Degree Wide Beam
This is a critical step for maximizing the fixture's performance. The 240W flood light projects a 150-degree wide beam.
For Warehouses: Aim the fixture relatively straight down to maximize floor illumination and eliminate shadows between aisles.
For Sports Fields: Angle the fixture outward to overlap with adjacent lights, creating a seamless, shadow-free wash across the pitch.
For Roadways: Tilt the fixture downward at an angle to ensure the 31,200 lumens hit the asphalt without creating blinding glare for drivers.
Once the precise angle is achieved, fully tighten the dual locking bolts. The heavy-duty design guarantees the fixture will not slip or droop over time.
Step-by-Step Electrical Wiring: The Pre-Wired Advantage
The electrical connection is often the most daunting part of high-power lighting installation. The 240W flood light simplifies this through its pre-wired, color-coded interface.
Decoding the Pre-Wired Harness
The factory-installed power cable is designed for clarity and safety. The internal wires are clearly color-coded to international standards:
Earth (Yellow/Green): The grounding wire. This is critical for safety, preventing electric shock in the event of a short circuit.
Live (Brown): The wire carrying the incoming electrical current.
Neutral (Blue): The return path for the current.
Making the Junction Box Connection
Since the fixture is pre-wired, the electrical connection is made at a junction box located near the mounting point, rather than inside the fixture itself.
Stripping and Connecting
Carefully strip the outer insulation of the power cable to expose the three inner wires. Strip about 1/2 inch of insulation from the end of each colored wire. Using waterproof wire nuts or a sealed junction box terminal block, connect the Earth to Earth, Live to Live, and Neutral to Neutral.
Waterproofing the Junction
Ensure the junction box itself is rated for outdoor use and is properly sealed. Because the fixture's internal connections are fully sealed at the factory, the only point of vulnerability is the junction box. Take the time to seal it correctly to prevent moisture from traveling up the cable.
The Role of the Sealed Metallic Cable Gland
Look closely at where the power cable exits the aluminum housing. You will see a heavy-duty, metallic cable gland.
Preserving the IP65 Waterproof Seal
This gland is a critical component of the fixture's IP65 waterproof rating. It uses a compression mechanism to squeeze a silicone seal tightly around the cable, preventing water from entering the housing. Because the fixture is pre-wired at the factory, this gland is securely tightened and sealed by the manufacturer. By making your electrical connections at an external junction box, you preserve this factory seal completely, ensuring the internal electronics remain dry and operational for years.
Post-Installation: Testing and Long-Term Performance
With the physical mounting and wiring complete, it is time to test the system and consider the long-term operational benefits.
Powering On and Verification
Turn the power back on at the circuit breaker. The 240W flood light should illuminate immediately (LEDs have no warm-up time).
Checking the 5000K Daylight Output
Observe the light output. The fixture should emit a crisp, uniform 5000K daylight color temperature. The light should be intensely bright-31,200 lumens-but evenly distributed across the 150-degree beam, with no harsh hotspots or dark shadows.
Final Beam Adjustment (If Needed)
If the light is not hitting the intended target area perfectly, loosen the dual locking bolts on the bracket, adjust the angle slightly, and re-tighten. The ease of this adjustment is a major benefit of the rotatable bracket design.
Why Installation is Only Half the Battle: Maintenance-Free Operation
The true value of this installation is not just how easily it goes up, but how long it stays up without requiring maintenance.
Multi-Board Convection Cooling
The fixture is designed to survive 24/7 operation. The multi-board convection cooling design utilizes the deep vertical fins on the aluminum alloy housing to passively dissipate heat. As the 392 LED chips generate heat, the air within the fins warms and rises, drawing cooler air in from below. This "chimney effect" keeps the LED junction temperatures low, preventing the overheating that causes rapid lumen depreciation and catastrophic failure in cheaper fixtures.
The Non-Yellowing Polycarbonate Lens
The lens covering the 392 LED chips is a premium, non-yellowing polycarbonate. Unlike cheap acrylic lenses that turn yellow and cloudy after a few months of UV exposure, this lens is chemically stabilized to resist degradation. It remains perfectly transparent, ensuring that the full 31,200 lumens are projected onto the target area year after year. This eliminates the need for the most common maintenance call: replacing a fixture because the lens has become opaque.
Conclusion: Unmatched Installation Efficiency and ROI
Installing super high-power flood lights no longer requires a massive crew, specialized cranes, or complex, risky electrical work inside weatherproof housings. The 240W Arena LED Flood Light is a masterclass in contractor-friendly design.
By utilizing the heavy-duty rotatable bracket, installers can achieve precise aiming of the powerful 150-degree beam with minimal effort. The pre-wired, color-coded cable and sealed metallic cable gland allow for rapid, safe electrical connections at an external junction box, entirely preserving the fixture's IP65 waterproof integrity.
Once installed, the advanced multi-board convection cooling and non-yellowing lens ensure that the fixture operates maintenance-free for tens of thousands of hours. For facility managers and contractors, this translates directly to drastically reduced initial labor costs and the complete elimination of future high-altitude maintenance expenses, delivering an unparalleled Return on Investment (ROI).
How To Cooperate With Us?
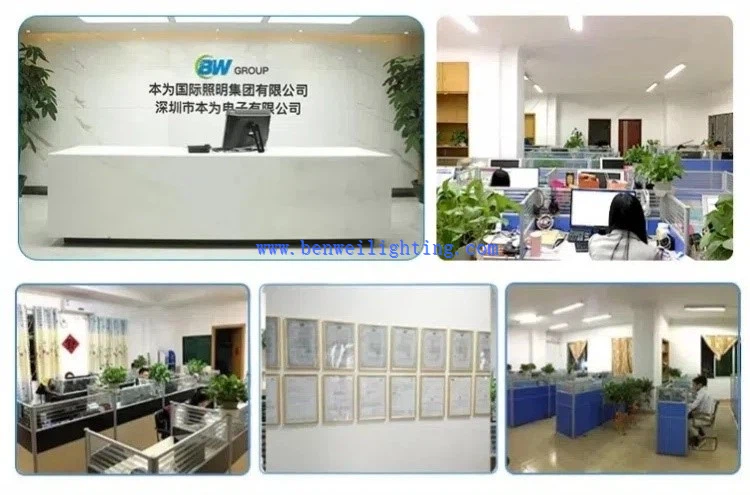
We are happy to have total control over the manufacturing process and the calibre of our products since we have our own facilities. Since we are producers rather than just brokers, we are dedicated to providing our customers with the best pricing. Since we are certain that the price and quality of our products are clear, we invite customers to see our samples first. Our commitment to quality and customer satisfaction drives us to continuously provide top-notch goods.
Our address
3rd Floor, 5th Building, Hebei Industrial Park, Hualian Community, Longhua District, Shenzhen, China