
Introduction: The Strategic Importance of Professional Installation
The Intersection of Art and Engineering
In the modern lighting industry, the difference between a good lighting design and a great one often lies in the execution. A designer may program a spectacular pixel-mapped chase sequence or a flawless wall wash, but if the fixtures are improperly mounted, misaligned, or electrically mismanaged, the visual impact is irreparably diminished. Lighting installation is not merely a physical task; it is an engineering discipline that requires an understanding of structural mechanics, electrical distribution, signal routing, and thermal dynamics.
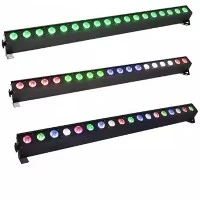
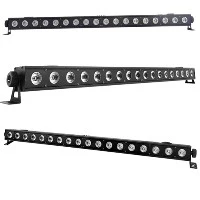
For a professional-grade LED bar, the installation process is a critical phase that determines the fixture's real-world performance. The robust features engineered into the product-such as the wear-resistant and scratch-resistant PVC outer layer of the cast aluminum case, or the high-transmittance acrylic lens-are designed to withstand the rigors of continuous operation, provided they are deployed correctly. This guide is designed to bridge the gap between the theoretical capabilities of the fixture and its practical application in the field.
Understanding the Fixture: A Technical Overview
Before any mounting hardware is secured or cables are run, the installer must have a comprehensive understanding of the specific LED bar being deployed. The fixture at the center of this guide represents the current state-of-the-art in linear LED technology. It features a cast aluminum case made of a three-layer material, providing good heat resistance, effective anti-aging, oxidation resistance, wear resistance, and scratch resistance. The optical system relies on an acrylic lens with transmittance above 92%, ensuring soft light and clear vision.
Internally, the fixture is equipped with a built-in high-speed cooling fan and a high-power supply featuring wide voltage input and stable current output. Understanding that the fixture has a wide voltage input is particularly crucial for the electrical planning phase, as it allows for deployment on various power grids without the need for external transformers. Every step in the installation process outlined below is informed by these specific technical characteristics.
The Thesis: Installation as a Driver of Longevity and ROI
This paper argues that a systematic, step-by-step approach to mounting and installation is not just a matter of safety, but a direct driver of a fixture's total cost of ownership (TCO) and return on investment (ROI). By following professional installation protocols, technicians can maximize the efficiency of the cooling system, protect the optical integrity of the acrylic lens, and ensure the stable current output of the power supply is maintained. The result is a lighting installation that not only looks exceptional on day one but continues to perform reliably for years to come.

Pre-Installation Planning and Site Assessment
Structural Integrity and Mounting Surface Analysis
Load Bearing and Vibration Considerations
The first phase of any successful installation is a thorough site assessment. LED bars, while typically lightweight due to the cast aluminum construction, still impose a structural load on the mounting surface. The installer must evaluate whether the wall, truss, or ceiling structure can safely support the combined weight of the fixtures, brackets, and cabling.
In touring and event environments, vibration is a significant factor. The cast aluminum case of the LED bar is designed to be structurally rigid, but the mounting hardware must also account for dynamic loads. If mounting to a stage truss, ensure that all clamps are rated for the specific diameter of the pipe and are tightened to the manufacturer's torque specifications.
Environmental Factors: Heat and Dust
The placement of the LED bar must be carefully considered relative to the environment. While the fixture has "good heat resistance" and an "advanced heat resistant layer" in its housing, it still requires adequate ambient airflow to function optimally. The built-in high-speed cooling fans draw in ambient air to cool the internal components; therefore, the fixture should not be mounted in an enclosed, unventilated space.
Furthermore, in dusty environments such as convention centers or outdoor festival stages, the orientation of the fixture can impact the accumulation of dust on the acrylic lens. While the lens has "chemical stability and weather resistance," regular cleaning will be required to maintain the >92% transmittance.
Power Distribution and Wide Voltage Advantages
Calculating Power Load and Circuit Planning
Proper power planning is essential to prevent overloads and tripped breakers. Before installation, calculate the total power draw of the LED bar array and ensure it does not exceed the capacity of the available circuits. A significant advantage of this specific fixture is its high-power supply with wide voltage input.
This feature allows the fixture to operate across a broad spectrum of voltages, typically from 100V to 240V. For the installer, this means the fixture can be plugged into standard North American 120V circuits or European 230V circuits with equal reliability. This eliminates the need for cumbersome step-up or step-down transformers, simplifying the rigging and reducing the weight of the equipment pack.
Daisy-Chaining and Stable Current Output
The "stable current output" of the power supply is critical for flicker-free dimming and consistent color mixing. When planning the power distribution, installers should adhere to the manufacturer's recommended maximum daisy-chain limit. While the energy-saving and low-consumption design of the power supply allows for multiple units to be linked, exceeding the limit can cause voltage drops at the end of the chain, potentially compromising the stable current output and leading to inconsistent light levels.
Signal Routing and DMX Control Planning
DMX Topology and Cable Management
For fixtures equipped with pixel mapping or dynamic color control, a robust DMX signal routing plan is essential. The installer must determine whether a daisy-chain or star topology will be used. Regardless of the topology, DMX cables should be kept separate from power cables to prevent electromagnetic interference (EMI).
Proper cable management is not just about aesthetics; it is about reliability. In touring environments, loose cables can become snagged, leading to disconnected signals and dark fixtures. The use of cable ties, velcro straps, and cable trays will ensure that the signal and power lines are secure and protected from physical stress.
Hardware and Fixture Preparation
Unboxing and Visual Inspection of the Three-Layer Housing
Verifying the Condition of the Cast Aluminum Case
Before mounting, every fixture must undergo a visual inspection. The cast aluminum case, made of a three-layer material, is designed to be wear-resistant and scratch-resistant. However, transport and handling can sometimes cause damage. Check the outer PVC layer for any deep gouges that might compromise the underlying anti-aging oxide layer or the advanced heat resistant layer. While minor scratches are purely cosmetic, deep impacts could indicate internal damage to the power supply or LED array.
Inspecting the Acrylic Lens and Cooling Vents
Inspect the acrylic lens for any cracks or heavy smudges. The lens is designed to provide "soft light and clear vision," and any physical damage will degrade the optical output. Additionally, check the cooling vents to ensure they are free from packing material or debris that could obstruct airflow to the built-in high-speed cooling fans.
Adjusting the Mounting Brackets (Yokes)
Understanding the Bracket Mechanics
Professional LED bars typically feature adjustable mounting brackets (often called yokes) that allow for precise aiming of the fixture. These brackets are usually secured to the cast aluminum case with heavy-duty bolts and lock washers. Before mounting, the installer should loosen these bolts to allow for easy adjustment during the installation phase.
Setting the Initial Angle
Based on the lighting design plan, set the initial angle of the brackets. For a wall wash application, the fixture may need to be angled slightly toward the wall to achieve the desired gradient. For a stage backdrop frame, the fixture might need to be aimed directly forward. The goal is to get the fixture close to its final position before it is secured to the mounting surface, reducing the amount of on-site adjustment required at height.
Safety Cabling and Secondary Suspension
The Importance of Safety Cables
In any overhead installation-whether in a church, a nightclub, or a trade show booth-safety is the paramount concern. A safety cable must be used for every fixture mounted above head height. The cable should be rated for a weight significantly greater than the fixture and should be threaded through the designated safety point on the fixture's bracket or housing, securing it to the primary structural support.
Verifying Structural Fasteners
Ensure that all mounting bolts, clamps, and brackets are of the appropriate grade and are secured with locking mechanisms (such as lock nuts or thread-locking fluid) to prevent loosening from vibration. The robust cast aluminum housing can withstand high torque, but over-tightening can strip the threads.
Step-by-Step Mounting and Installation Process
Step 1: Securing the Mounting Brackets to the Surface
Wall or Truss Mounting Techniques
If mounting to a wall or architectural surface, use appropriate anchors (e.g., concrete anchors for masonry, or heavy-duty toggle bolts for drywall). Mark the drill holes using the bracket as a template. If mounting to a truss, attach the appropriate C-clamps or trigger clamps to the bracket's mounting holes and tighten them securely to the pipe.
Ensuring Level Alignment
For linear fixtures, level alignment is critical. A slightly crooked LED bar will be immediately noticeable, especially when used to frame a stage or wash a wall. Use a spirit level to verify that the mounting brackets are perfectly horizontal or vertical before final tightening.
Step 2: Positioning and Aligning the Fixtures
Attaching the LED Bar to the Brackets
With the brackets secured to the surface, carefully lift the LED bar and align its mounting points with the bracket holes. Insert the mounting bolts (typically M10 or M12) and hand-tighten them initially. This allows for fine-tuning of the angle.
Achieving the Desired Optical Wash or Frame
Once the fixture is hanging, turn it on temporarily (if safe to do so) or use a visual estimation to set the final angle. The high-transmittance acrylic lens produces a soft, even light; adjust the fixture until the beam spreads evenly across the target surface. Once the desired angle is achieved, fully tighten the bracket bolts. Ensure that the "wear-resistant and scratch-resistant" housing is not stressed or twisted during this process.
Step 3: Power and Data Cabling (Daisy-Chaining)
Connecting the High-Power Supply
Connect the power cable to the fixture's input. The wide voltage input feature simplifies this step, as there is no need to worry about voltage selection switches. However, ensure that the power cable is of a sufficient gauge to handle the current draw, especially if daisy-chaining multiple units.
Linking DMX Control Cables
Connect the DMX input and output cables. Ensure that the DMX terminator (a 120-ohm resistor) is placed on the final fixture in the chain to prevent signal reflection and erratic behavior. Check that the connections are secure and that the cables are not under tension. Use velcro ties to bundle the power and data cables neatly along the mounting surface, ensuring they do not obstruct the airflow to the cooling fans.
Step 4: Configuring the Cooling and Power System
Verifying Fan Operation
Once power is applied, verify that the built-in high-speed cooling fans are operating correctly. The advanced thermal management system is designed to "effectively relieve high temperatures" and "ensure that the equipment works stably for a long time." Listen for any unusual noises (e.g., rattling or grinding) that might indicate a fan bearing issue. Ensure that there is at least a few inches of clearance around the vents for optimal airflow.
Setting the DMX Address
Using the fixture's onboard menu display, set the desired DMX address. The stable current output of the power supply will ensure that the fixture responds immediately and accurately to the console's commands. Program a few test cues (e.g., full red, full green, full blue, and a strobe) to verify that the fixture is receiving the signal and functioning correctly.
Post-Installation Testing and Optimization
DMX Addressing and Control Verification
Testing the Full Range of Motion and Color Mixing
Run a comprehensive test sequence from the lighting console. Verify that the fixture smoothly transitions through the color spectrum. The "soft light and clear vision" provided by the acrylic lens should present vivid, uniform colors without any visible "hot spots" or dark edges. Check the dimming curve to ensure it is smooth and flicker-free.
Verifying Pixel Mapping (if applicable)
If the fixture is part of a pixel-mapped array, test the individual LED cell control. Ensure that each cell responds independently and that the spatial mapping in the software aligns with the physical layout of the bars.
Thermal Performance Verification (Cooling System Check)
Monitoring Temperature During Extended Operation
After the installation is complete, run the fixtures at full brightness for at least 30 minutes. This will simulate a live event load and allow the thermal management system to reach its operating temperature. The cast aluminum case, with its "advanced heat resistant layer," should dissipate heat effectively, and the high-speed fans should maintain a stable internal temperature.
Checking for Lumen Depreciation or Color Shift
As the fixture heats up, observe if there is any noticeable color shift or drop in brightness. A well-engineered power supply with "stable current output" and effective thermal management should prevent these issues. If a significant color shift occurs, it may indicate an airflow blockage or a power supply issue.
Optical Alignment (Acrylic Lens Optimization)
Final Visual Inspection and Cleaning
Once the installation is fully operational, perform a final visual inspection. Clean the acrylic lens with a soft, lint-free cloth and a mild glass cleaner to remove any fingerprints or dust accumulated during the installation. The "crystal clarity" of the lens is a major selling point, and a clean lens maximizes the >92% transmittance.
Adjusting for the Perfect Wash
Make any final micro-adjustments to the fixture's angle to ensure the wash is perfectly even. The goal is to create a seamless visual element that enhances the environment, whether it is highlighting the architecture of a church, creating a dynamic backdrop at a trade show, or washing a nightclub wall with vibrant color.
Conclusion: The Strategic Value of Professional Installation
The installation of LED bar lighting is a process that demands as much precision and care as the lighting design itself. The fixture described in this guide-with its three-layer cast aluminum case, high-transmittance acrylic lens, wide-voltage power supply, and advanced cooling system-is a sophisticated piece of engineering designed for the rigors of professional use.
However, the true potential of this equipment is only realized through a meticulous installation process. By following this step-by-step guide-from the initial site assessment and power planning, through the hardware preparation and mounting, to the final testing and thermal optimization-installers can ensure that the fixtures deliver exceptional performance, safety, and longevity.
For the venue owner, event planner, or church technical director, investing in high-quality LED bars is the first step toward elevating the visual experience of the space. Ensuring that these fixtures are installed by professionals who understand the nuances of their engineering is the second, and equally critical, step. The combination of premium equipment and expert installation guarantees a lighting system that is reliable, energy-efficient, and capable of transforming any space into a captivating visual environment.
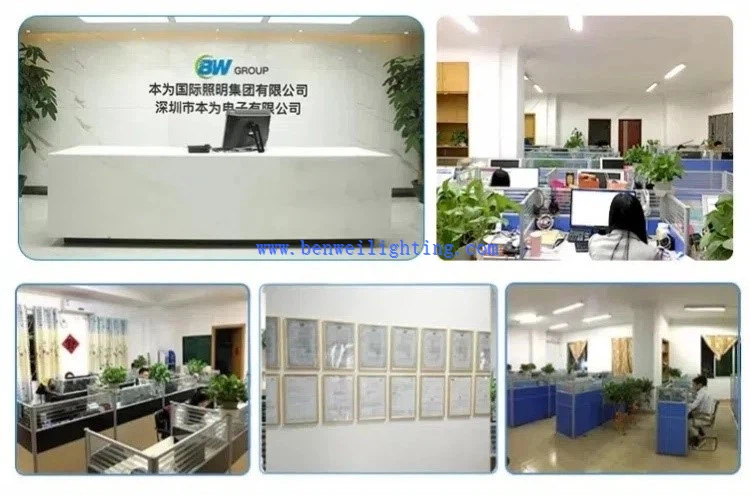
How To Cooperate With Us?
Our firm prides itself on owning its own factory, guaranteeing complete control over the production process and the quality of our goods. We are not only agents; we are manufacturers committed to offering our clients the most competitive rates available. We invite consumers to evaluate our samples first, as we are assured that the quality and pricing of our items are self-evident. Our dedication to excellence and client satisfaction compels us to consistently perform at our best and provide superior quality products.
Our address
3rd Floor, 5th Building, Hebei Industrial Park, Hualian Community, Longhua District, Shenzhen, China