Grille lamp installation specifications How to install the grille lamp?
In general, grille lights are more common in office places. Because there is usually a ceiling above the office ceiling, grille lights are installed on the ceiling. However, many people may not know the installation, so they are more curious, if they need to be replaced , I am more curious when I see it, so what is the installation specification for grille lights? How to install the grille light? Don't worry, BENWEI LIGHTING is here to explain it to everyone, let's take a look.
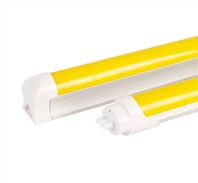
Grille light
Installation specifications for grille lights:
Equipment tools and materials
Equipment: electric welding machine, gun welding machine, electric drill tool, handle wire, welding pliers, welding helmet, gloves, flat shovel, steel tape measure, spirit level, movable hand brush
Material: processing and forming material: formed steel grating (in line with design requirements) Form: load flat steel 40mm×5mm, load flat steel center spacing 40mm, cross bar center spacing 100mm (plane type and tooth type) galvanized mounting clamp: Galvanized self-tapping screw: consumable material electrode screw zinc-rich paint drill bit
Program introduction
Number identification according to the layout design drawing; installation guidance according to the layout design drawing; the load flat steel according to the design meets the material requirements of Q235-A; the steel grating load test report; the galvanized layer meets the specification requirements; the flatness of the steel grating The degree should meet the requirements. Operation sequence Preparation→Pre-installation inspection→steel grating in place by area→temporary fixing→deviation measurement→deviation correction→final fixing
Operation method
Accurately locate and pay off the line according to the requirements of the layout design; place the steel grating in different areas according to the number of the layout design, and install them in different areas at the same time. After completing one area, install the next area, and each area should be from the middle to the two sides. Carry out; during installation, strictly control the spacing between the steel gratings and between the steel gratings and other structures according to the requirements of the specifications; after the steel gratings are in place, they are temporarily fixed with installation clips, and the deviation is measured and corrected. Make the final fix; the steel gratings are arranged in the direction shown in the figure. When encountering the H-shaped steel column, the steel grating opens, and the opening is made of 100mm (height)×6mm skirting board. If the steel grating does not need to be moved after installation, it can be welded to the support or steel beam. After welding, remove welding slag and splashes, and manually apply two coats of zinc-rich paint.
Precautions for grille lamp installation
1. In order to ensure the safe installation, maintenance and inspection of lamps, please entrust electrical professionals to be responsible. Non-professional construction is prone to danger.
2. Do not install the lamps in the places shown. This luminaire is specially designed for ceiling installation.
3. Do not use in parallel with dimmers, do not use with dimmers, sensors, to avoid malfunction. Do not install above high-temperature objects and humid places.
4. Do not use light sources greater than the specified maximum power (please refer to the power sticker on the product). Under no circumstances should the lamps be covered by thermal insulation pads or similar materials.
5. Make sure that there are 75mm vents around the product. The use of this lamp cannot violate any fire protection regulations. Before maintenance, installation, or replacement of the light source, be sure to cut off the power supply and confirm that the light source is installed correctly.
Grille light
How to install the grille light?
1. Remove the grille reflector on the lamp panel. Take care to handle it gently when removing the grille reflector. Do not scratch. Place the lamp body on the reserved ceiling keel. Please pay attention to the position of the four sides when placing it. Let the four sides of the lamp be completely placed on the keel bar to prevent the lamp from falling. Note that when the lamp is heavy, please use the wire to hoist the lamp on the ceiling. In short, be careful not to damage the lamp.
2. Pass the power cord through the outlet hole and connect it to the terminal block correctly. Please pay attention to the live wire at the L mark, the neutral wire at the N mark, and the ground wire at the ground mark.
3. Install the light source correctly. When installing the light source, please pay attention to insert the light source into the lamp holder slot. After you hear a pop, it means that the light source is in good contact with the copper plate of the lamp holder. Otherwise, even after the installation is completed, the light may appear when the switch is turned on. If it is not bright, it means that the light source is not in good contact with the copper plate of the lamp cap.
4. Tie one end of the strap of the grille reflector into the strap hole of the lamp body to facilitate the subsequent replacement of the light source. Clip the grille reflector into the lamp body? Note that the shrapnel must be in good contact with the grille reflector to avoid the grille The reflector comes off.
5. Turn on the switch and the light is on and the installation is complete. If the light is not on, you need to perform a step-by-step analysis and inspection according to the installation steps of the LED grille light, and deal with it after finding the cause until the installation is successful.
Grille light
Let me stop here for the explanation of the installation specifications of the grille lamp and the knowledge of how to install the grille lamp. The content is for your reference only, and I hope it can be helpful to you.