Converting fluorescent lights to LED is a straightforward DIY project that can save 30–70% in energy costs while eliminating mercury and flicker issues. Here's a professional step-by-step guide:
1. Choose Your Conversion Method
| Method | How It Works | Pros | Cons |
|---|---|---|---|
| Plug-and-Play (Type A) | LED tube uses existing ballast | ⚡ No rewiring needed | ⚠️ Ballast may fail later |
| Ballast Bypass (Type B) | Remove ballast, wire power directly to sockets | 💡 No ballast = higher efficiency | 🔧 Requires electrical skills |
| Hybrid (Type A/B) | Works with or without ballast | 🛠️ Flexible future upgrades | 💸 More expensive |
Recommendation: Ballast bypass (Type B) for long-term reliability.
For most commercial and residential projects, the ballast bypass method is the top choice when converting fluorescent lights to LEDs.This approach eliminates the ballast-the most common point of failure in older fluorescent systems.
2. Tools & Materials Needed
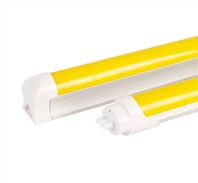
LED tubes (match length: T8/T12 → 2ft/4ft/8ft)
Wire strippers/cutters
Non-contact voltage tester
Wire nuts (UL-listed)
Screwdriver
Safety glasses & gloves
(For ballast bypass) New tombstones (if existing are shunted)
3. Step-by-Step Conversion (Ballast Bypass Method)
A. Safety First
Turn off power at the circuit breaker.
Verify no voltage with a tester.
Remove fluorescent tubes and diffuser cover.
B. Remove Old Components
Locate ballast (metal box behind tubes).
Cut wires connected to ballast (leave 6" leads).
Remove ballast (unscrew mounting hardware).
Dispose of ballast & fluorescent tubes at e-waste facility.
C. Rewire Tombstones
| Tombstone Type | Action Needed |
|---|---|
| Non-shunted | No replacement needed |
| Shunted (common in T12) | Replace with non-shunted tombstones ($1–$2 each) |
Identify wiring:
Single-end powered LEDs: Hot (black) to one end, neutral (white) to same end.
Dual-end powered: Hot to one end, neutral to opposite end.
(Check diagram included with LED tubes)
Connect wires:
Join all black wires → connect to AC hot (black).
Join all white wires → connect to AC neutral (white).
Cap ground wires (green) together.
https://www.ledlightexpert.com/assets/images/type-b-wiring-diagram.jpg
D. Install LED Tubes
Insert tubes into tombstones (rotate 90° to lock).
Restore power and test.
4. Critical Buying Tips for LED Tubes
Lumen Match: Replace 32W fluorescent with ~1800–2200 lm LED.
Color Temp: 4000K (office) / 3000K (home) / 5000K (garage).
CRI >80: For accurate color rendering.
Certifications: Look for UL/DLC listing.
Dimmable: Only if needed (requires compatible dimmer).
💡 Top Brands: Philips, Sylvania, GE, Hyperikon.

5. Common Mistakes to Avoid
⚠️ Using Type B tubes with ballast still installed → Fire risk!
⚠️ Mixing tube types in same fixture → Circuit damage.
⚠️ Ignoring tombstone type → Shunted tombstones short-circuit LEDs.
⚠️ Skipping ballast removal → Ballasts fail in 2–5 years, leaving you in the dark.
6. Cost & Savings Breakdown
| Item | Cost | Savings (vs. fluorescent) |
|---|---|---|
| LED tubes (4ft) | $5–$15 each | ⚡ 15W vs 32W = 53% less energy |
| Electrician labor | $75–$150/fixture | 💰 Payback in 1–3 years |
| Ballast disposal | $1–$5 | ⏱️ LED lifespan: 50,000 hrs (vs 15,000) |
When to Hire an Electrician
Multi-fixture commercial buildings
High-voltage fixtures (277V)
If uncomfortable with wiring
Required by local code (some states mandate permits)
Pro Tip: For troffer lights (ceiling panels), consider LED retrofit kits ($30–$80) with magnetic mounting plates for tool-free installation.
By following this guide, you'll get instant brighter light, zero humming, and ~$15/year savings per fixture! you can get more information on http://www.benweilight.com