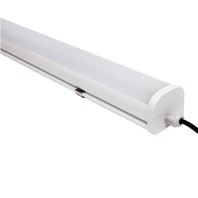
Surface-Mounted LED Panel Lights: Wiring & Ceiling Requirements Demystified
Surface-mounted LED panel lights offer versatile, energy-efficient illumination without the complexity of recessed installations. However, their successful deployment hinges on understanding two critical factors: wiring logistics and ceiling compatibility. Let's dissect these requirements to ensure safe, efficient installations.
1. Wiring: Pre-Buried vs. Surface Solutions
❌ Pre-Buried Wiring Is NOT Mandatory
Unlike recessed fixtures requiring concealed wiring, surface-mounted panels operate with flexible wiring options:
Surface Conduits: PVC or metallic conduits can route power along ceilings/walls.
Plug-and-Play Kits: Some models include cords plugging into nearby outlets (ideal for retrofits).
Junction Box Integration: Connect to existing ceiling boxes via flexible conduit.
Key Consideration: Local electrical codes (e.g., NEC Article 410) may mandate conduit use for exposed wiring. Always verify compliance.
2. Ceiling Load-Bearing & Material Compatibility
Surface-mounted panels add weight (typically 2–8 kg), demanding structural assessment:
🏗️ Load-Bearing Capacity
| Ceiling Type | Max Load Capacity* | Panel Light Suitability |
|---|---|---|
| Gypsum Board | 1.5–2 kg/cm² | ✅ Use anchors (toggle bolts) |
| Concrete | 10–15 kg/cm² | ✅ Direct screw mounting |
| Suspended Grid | Varies by system | ⚠️ Verify grid weight rating |
| *General guidelines; consult engineering reports. |
📐 Material-Specific Protocols
Gypsum Board (Drywall):
Use hollow-wall anchors (e.g., toggle bolts) distributing weight across the board.
Avoid mounting near seams or corners to prevent cracking.
Max Weight: ≤5 kg/light without reinforcement.
Concrete:
Concrete screws (Tapcons) or expansion bolts provide secure mounting.
Pre-drill holes to avoid material stress.
Suspended Ceilings:
Mount panels directly to building structure (not grid tiles) using drop rods.
Grid systems rarely support >4 kg without sagging.
⚠️ Critical Installation Risks to Avoid
Overloading Thin Drywall:
Gypsum exceeding 5 kg load risks collapse. Reinforce with plywood backing if needed.
Vibration Damage:
In high-traffic areas, use anti-vibration pads to prevent screw loosening.
Heat Trapping:
Maintain 5–10 cm clearance between panel and ceiling for airflow (prevents driver overheating).
✅ Best Practices for Reliable Installations
Pre-Installation Checks:
Test ceiling density with a stud finder; identify joists/conduits.
Calculate total weight (panel + driver). Add 20% safety margin.
Mounting Hardware Selection:
| Material | Recommended Hardware |
|---|---|
| Gypsum Board | Toggle bolts (e.g., 10 cm) |
| Concrete | Wedge anchors (M6/M8) |
| Metal Joists | Self-drilling screws |
Wiring Safety:
Use wire nuts/terminal blocks for secure connections.
Secure cables with clips-avoid dangling wires.
💡 The Future: Magnetic & Adhesive Solutions
Emerging technologies simplify installations:
Magnetic Mounting: Panels with integrated magnets attach to steel ceilings (no drilling).
VHB Tape: For sub-2 kg panels on smooth surfaces (e.g., PVC ceilings).
▶️ Pro Tip: Choose IP54-rated fixtures for humid areas (bathrooms/kitchens) to prevent moisture damage.
Conclusion: Flexibility Without Compromise
Surface-mounted LED panels eliminate recessed wiring complexities but demand methodical planning. Pre-buried wiring is optional-surface conduits or plug-in solutions suffice. Meanwhile, ceiling integrity dictates mounting strategy:
Gypsum: Reinforce with anchors.
Concrete: Drill securely.
Suspended Grids: Bypass the grid entirely.
By aligning hardware choices with ceiling physics and leveraging modern mounting innovations, these panels deliver flawless, long-lasting illumination-transforming spaces without structural compromise.