
Why Downlights Are the Unsung Heroes of Home Lighting-And How to Style Them Like a Pro
In the grand tapestry of home design, lighting often takes a backseat to flashier elements like furniture, paint colors, or artwork. Yet, anyone who has stepped into a poorly lit room knows the profound impact lighting has on mood, functionality, and aesthetics. Among the various lighting options available, downlights stand out as the unsung heroes-quietly working behind the scenes to transform spaces without demanding attention. They lack the drama of a crystal chandelier or the whimsy of a pendant light, but their ability to blend seamlessly into any design while delivering targeted, customizable illumination makes them indispensable. This article explores why downlights deserve more recognition, delving into their unique advantages and providing expert tips on styling them to elevate your home like a professional designer.
To understand why downlights are unsung heroes, we must first acknowledge the limitations of traditional lighting solutions. For decades, homes relied heavily on a single central ceiling light-often a bulky fixture that cast uneven light, creating harsh shadows in corners and leaving key areas underlit. Floor lamps and table lamps helped but added clutter and required careful placement to avoid tripping hazards or visual distractions. Chandeliers, while elegant, are often overpowering in small spaces and can create glare. Downlights address these issues by offering a streamlined, unobtrusive alternative that delivers precise light exactly where it's needed. They work in harmony with a room's architecture, enhancing rather than competing with other design elements-a quality that makes them the backbone of effective lighting design.
One of the primary reasons downlights excel as unsung heroes is their versatility. Unlike specialized fixtures that serve a single purpose, downlights adapt to a wide range of needs and spaces. Whether you're lighting a cozy bedroom, a bustling kitchen, a home office, or a formal dining room, there's a downlight configuration that fits. This adaptability stems from their modular design and customizable features, including adjustable beam angles, variable color temperatures, and dimming capabilities. A single type of downlight can transition from providing bright task lighting in a kitchen to casting soft ambient light in a living room with the flip of a switch. This flexibility eliminates the need for multiple fixture types, simplifying both design and installation while ensuring cohesive lighting throughout the home.
Another key advantage of downlights is their ability to create layers of light-a fundamental principle of professional lighting design. Layered lighting combines ambient, task, and accent lighting to add depth and dimension to a room, avoiding the flat, lifeless look of relying on a single light source. Downlights excel at all three layers: wide-beam recessed downlights provide ambient illumination, medium-beam fixtures deliver task lighting over workspaces, and narrow-beam adjustable downlights serve as accent lighting to highlight artwork or architectural details. By integrating these layers, downlights transform rooms from functional spaces into environments that feel thoughtfully curated and inviting. Professional designers have long understood this, using downlights as the foundation of their lighting plans while adding other fixtures for style and personality.
Energy efficiency is another area where downlights shine, though their contribution often goes unnoticed. Traditional incandescent bulbs, once standard in lighting fixtures, are notoriously energy-inefficient, converting most of their energy into heat rather than light. Halogen bulbs improved on this but still paled in comparison to LEDs. Modern downlights, almost universally equipped with LED technology, consume up to 85% less energy than incandescent equivalents while lasting 25 to 50 times longer. This not only reduces utility bills but also minimizes environmental impact-a silent benefit that adds up over time. Additionally, LEDs produce very little heat, making downlights safer to use in areas with insulation or near flammable materials, such as above kitchen cabinets or in attic conversions. These practical advantages make downlights a smart, sustainable choice that works hard without drawing attention to their efforts.
Aesthetically, downlights excel at creating a clean, uncluttered look that complements any design style-from minimalist to traditional. Their recessed design means they don't hang down from the ceiling or take up floor space, preserving sightlines and making rooms feel larger and more open. This is particularly valuable in small spaces, where every inch counts, or in rooms with low ceilings, where pendant lights or chandeliers would feel oppressive. The trim of downlights can be customized to match ceiling colors or finishes, allowing them to blend in seamlessly or make a subtle statement with metallic accents. Unlike other fixtures that can date a room as trends change, downlights have a timeless quality that ensures they remain stylish for years to come. They provide a neutral backdrop that lets other design elements shine, proving that sometimes the most impactful contributions are the ones you barely notice.
Now that we've established why downlights are unsung heroes, let's turn to the art of styling them like a pro. Professional designers don't just install downlights randomly; they use strategic planning to maximize their effectiveness and aesthetic appeal. The first step is to assess the room's function and layout. Every space has unique lighting needs: a kitchen requires bright, even light over countertops, while a bedroom benefits from soft, adjustable light for relaxation. A home office needs focused light to reduce eye strain, and a living room should have versatile lighting that adapts to movie nights, reading, or entertaining. By identifying these needs, you can determine the type, placement, and quantity of downlights required.
For general ambient lighting, which forms the base layer, professional designers recommend using wide-beam downlights (50°–120°) spaced evenly throughout the room. The goal is to create a uniform glow that eliminates dark corners without creating glare. A good rule of thumb is to space downlights 2–3 feet apart, depending on the room size and ceiling height. For example, in a 12x14-foot living room with an 8-foot ceiling, 6–8 wide-beam downlights installed in a grid pattern would provide balanced ambient light. It's important to avoid placing downlights directly above seating areas, as this can cast unflattering shadows on faces; instead, position them slightly off-center to wash walls with light, making the room feel larger.
Task lighting, the second layer, focuses on specific areas where activities like cooking, reading, or working occur. In kitchens, medium-beam downlights (30°–45°) should be installed above countertops, islands, and stovetops to ensure precise illumination for chopping, cooking, and cleaning. Under-cabinet downlights are also a pro move, providing additional task lighting without shadows. In home offices, position medium-beam downlights above desks, angling them slightly to avoid glare on computer screens. Bedrooms benefit from adjustable downlights near bedside tables, allowing for targeted reading light without disturbing a sleeping partner. Professionals often use dimmers for task lighting, enabling quick adjustments based on the activity-brighter for focused work, dimmer for relaxation.
Accent lighting, the third layer, adds depth and visual interest by highlighting key features in a room. This is where adjustable downlights truly shine, as their tiltable design allows you to direct light onto artwork, architectural details (like exposed brick or crown molding), bookshelves, or decorative objects. Narrow-beam downlights (15°–25°) are ideal for this purpose, as they create a focused beam that draws the eye to the highlighted item without washing out the surrounding area. When accenting artwork, position the downlight 12–18 inches above the piece and angle it 30°–45° to avoid glare and evenly illuminate the entire artwork. For collections or shelving, space narrow-beam downlights every 18–24 inches to ensure each item receives attention. Accent lighting adds a professional touch by creating focal points that make the room feel curated and intentional.
Color temperature is another crucial element in styling downlights like a pro. Measured in Kelvins (K), color temperature determines whether light appears warm (yellowish) or cool (bluish). Warm white (2700K–3000K) creates a cozy, inviting atmosphere, making it ideal for bedrooms, living rooms, and dining rooms. Cool white (4000K–5000K) mimics natural daylight, enhancing focus and alertness-perfect for kitchens, home offices, and bathrooms. Professional designers often mix color temperatures strategically: using warm white for ambient lighting in a living room while incorporating cool white task lighting above a reading nook. However, consistency is key in open-concept spaces to avoid a disjointed feel. Many modern downlights offer tunable color temperatures, allowing you to adjust the light from warm to cool based on the time of day or mood-an advanced feature that adds versatility.
Dimmers are a must-have for styling downlights like a pro, yet they're often overlooked by homeowners. Dimming capabilities transform downlights from static fixtures into dynamic tools that adapt to different occasions. A bright, fully lit kitchen during the day can transition to soft, ambient light for a dinner party in the evening with the turn of a dial. In living rooms, dimmers allow you to create movie-night darkness or gentle light for conversation. Bedrooms benefit from dimmers that let you gradually lower light levels as you prepare for sleep. When installing dimmers, opt for smart dimmers that can be controlled via apps or voice commands, adding convenience and allowing for preset lighting scenes (e.g., "morning," "evening," "entertaining"). Professionals know that the ability to adjust light intensity is key to creating atmosphere and maximizing the versatility of downlights.
Placement is everything when it comes to downlights, and professional designers follow specific guidelines to ensure optimal results. In rectangular rooms, downlights should be placed in rows parallel to the longer walls, creating a balanced look. In kitchens, they should align with countertops and cabinetry for a cohesive appearance. Avoid placing downlights too close to walls, as this can create uneven lighting and shadows; aim for 12–18 inches from the wall for wide-beam fixtures. When lighting artwork or focal points, position the downlight so the beam covers the entire object without spilling over excessively. For sloped ceilings, use adjustable downlights designed to angle with the ceiling pitch, ensuring light is directed where it's needed. Taking the time to map out placement before installation prevents common mistakes like uneven spacing or underlit areas, resulting in a polished, professional finish.
Mixing downlights with other lighting fixtures is another pro strategy that adds depth and personality to a room. While downlights form the foundation, combining them with pendant lights, floor lamps, or wall sconces creates a layered effect that feels rich and inviting. In dining rooms, for example, recessed downlights can provide ambient light while a statement pendant hangs above the table for task and style. In living rooms, downlights offer general illumination, while floor lamps near seating areas add warmth and task lighting. Bedrooms can benefit from downlights for ambient light paired with wall sconces beside the bed for reading. The key is to ensure the different fixtures complement rather than compete with each other, with downlights serving as the unifying element that ties the lighting scheme together.
Material and finish choices for downlight trims may seem minor, but they can elevate a room's design when chosen thoughtfully. Professional designers match trim finishes to other metal elements in the room, such as door handles, cabinet hardware, or faucets, creating a cohesive look. Brushed nickel or chrome trims work well in modern or contemporary spaces, while brass or gold adds warmth to traditional or eclectic rooms. Matte white trims blend seamlessly into white ceilings, creating a minimalist look, while black trims can make a subtle statement in rooms with light-colored ceilings. For textured ceilings, such as popcorn or plaster, choose trims with a low profile to avoid drawing attention to uneven surfaces. Some designers even use adjustable trims that can be painted to match ceiling colors, ensuring downlights disappear completely when not in use. These small details may go unnoticed by most, but they contribute to a polished, professional aesthetic.
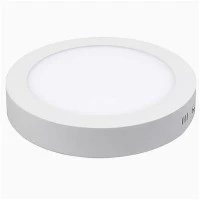
Installation and technical considerations are also critical to styling downlights like a pro. Hiring a licensed electrician is essential, especially for recessed downlights that require ceiling cutting and wiring. Professionals can ensure fixtures are spaced correctly, wired safely, and compatible with dimmers or smart home systems. They can also advise on the appropriate IP (Ingress Protection) ratings for damp or wet areas like bathrooms or kitchens, ensuring fixtures are moisture-resistant. For retrofits, surface-mounted downlights are a viable option, but professionals know how to install them to avoid a cluttered look, often grouping them in strategic locations rather than scattering them randomly. Proper installation prevents common issues like flickering lights, uneven illumination, or trim that sits unevenly with the ceiling-details that can undermine even the best styling efforts.
Finally, avoiding common mistakes is key to achieving a professional look with downlights. One of the biggest errors homeowners make is using too few downlights, resulting in dim, uneven lighting. A general guideline is to use one downlight for every 4–6 square feet of ceiling space, adjusting based on room function and ceiling height. Another mistake is overusing narrow-beam downlights, which can create a "spotlight effect" that feels harsh and disjointed. Professionals balance narrow, medium, and wide beams to create smooth transitions between light layers. Placing downlights directly above mirrors in bathrooms is another common pitfall, as it creates unflattering shadows on the face; instead, position them to the sides or above and angled downward. Finally, neglecting to test lighting before finalizing installation is a mistake-professionals often use temporary fixtures or mock-ups to ensure placement and brightness are correct before cutting holes or committing to a layout.
In conclusion, downlights are the unsung heroes of home lighting, quietly enhancing spaces with their versatility, efficiency, and unobtrusive design. They may lack the glamour of other fixtures, but their ability to deliver targeted, customizable light while blending seamlessly into any decor makes them essential for functional, beautiful homes. By understanding their unique advantages and following professional styling tips-from strategic placement and layered lighting to thoughtful material choices and technical precision-you can transform your space with downlights in a way that feels intentional and polished. Whether you're renovating a kitchen, updating a bedroom, or designing a new home, don't overlook these humble fixtures. With the right approach, downlights can elevate your home's lighting from ordinary to extraordinary, proving that sometimes the most impactful design elements are the ones that work behind the scenes.