I wouldn't say that I like the color temperature of the light in my RV since it looks too dark to work in my kitchen. I thus intended to replace it with a light white shade. It turns out that the procedure is easier to follow than I anticipated.
It just requires that you turn it off, open it up, and install a fresh set of light bulbs.
Here is a more thorough procedure for replacing RV ceiling light bulbs.
Using method 1 to upgrade the inside lights of an RV
change-rv-interior-light-bulbs
You may switch to an LED light bulb for more coolness and fewer power use if your RV ceiling light is incandescent.
Simple Step-by-Step Directions
First, take off the cover.
You may wish to dim the light before attempting to contact the cover. The light fixture's center is where the switch is located.
Time to take off the cover lens. Simply slide the cover-up down slowly after pushing it.
Try to pry the cover away from the light fixture by giving it a little wiggle.
To prevent the lens from not fitting properly when you put it back in, make sure that all of the tabs are secure.
Step 2: Change the lightbulb
Once all of the covers have been removed, swap out the old light bulbs with the new ones.
Because it's a touch delicate, grab the old light bulb rather than the plastic fixture holding it.
Pull it out carefully, not abruptly, with just a little wiggle.
The replacement LED bulb should be securely seated in the socket after being inserted.
To see whether the new bulb is operating, turn on the light.
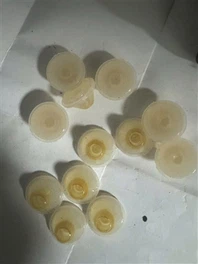
Second Approach: Putting in New Puck Lights
replace-rv-light-bulbs
Because puck lights are hooked into the ceiling, replacing them may seem difficult. Fortunately, they don't appear as difficult as they do.
Getting Ready.You will need a screwdriver if your puck light is secured with screws.
wrench pliers
Puck Lights: You have the option of purchasing a new set of puck lights or a diode board as a replacement. These lights are luminous, spherical LEDs that may assist in clearing certain regions.
Simple Step-by-Step Directions
First, take off the cover.
Puck lights may seem scary because to their cover and LEDs, but it is simple to remove them and replace them. These are the procedures.
To avoid an explosion when replacing the LED bulbs, turn off the power first.
Then, to remove the cover, twist it off in the other direction.
If your puck light is fastened to the ceiling with screws, remove the screws with a screwdriver before giving it a little pull. In our instance, the light is held in place by three screws.
You'll now see some dangling cables protruding from the ceiling.
Step 2: Unplug the old lamp
An LED ceiling puck lamp has two wires: a negative and a positive. There are also two other cables coming from the ceiling. All you have to do is cut the lines between them.
Locate the components that connect the wiring for the LED lights to the ceiling. Some people refer to it as unions or smashed nuts. Use some wrench pliers to squeeze those components.
Pull the smashed nuts off by bending the nuts back out. We'll need them once again in step 3, so put them away in a secure location.
Disconnect the old light now so you may replace it with a new one for the inside lights of the RV.
Rewire a new light in Step 3
It's time to wiring your new inside light to the ceiling, so go get it. Rewire it in the same manner that you did with the prior light.
White to white and black to black stripped wires should be spun together.
Recall the nuts you crushed? To ensure a firm bond, put them back on. Deeply bury the twisted wires in the smashed nuts.
Make use of a set of wrench pliers to squeeze the smashed nuts. To make sure they are tight, give them a slight pull.
Reinstall the light in the hole and the screw after finishing.
To see how to change an RV interior light bulb correctly, watch the video below.
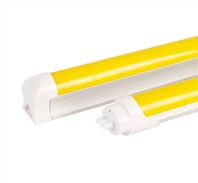
Connecting A New LED RV Ceiling Light, Method 3
RV owners choose the dome-shaped LEDs because of their high efficiency and extended lifespan. LED interior light replacement for RVs simply needs a few simple procedures and equipment.
Getting Ready
pliers for cutting angles
fittings with a quick disconnect
12-Volt RV Light: This light has a dome-like form, a stylish metal ring around it, and tension clips to keep it securely in place.
Simple Step-by-Step Directions
First, turn off the light.
The old light must be taken down from the ceiling as the first step in replacing the interior light bulbs in an RV.
Locate the springs and keep your fingers away from them since they might hurt you if they strike you.
Pull the LED dome light from the ceiling by grabbing it. It could require a little spinning.
The cables concealed within the hole will now be visible to you. Before changing the RV light bulbs, we ask that you turn the light off to stop any electricity from entering the cables.
Apply Quick Disconnects in Step 2
These lights are often connected together using butt connections. Try to replace them with fast detach fittings to improve accessibility for future connections.
Use a set of diagonal cutting pliers to remove the butt connections from each wire that is hanging from the ceiling.
Cut the wire ends to a length of approximately 3/16 of an inch, and then place them inside the quick disconnect's tiny tube.
Each wire should have fast disconnect fittings added.
Apply the same technique to the new RV light's cables.
Third step: attach the new light
Each wire must now be connected. If you have the quick disconnect installed, doing this is simple.
Each connector's wires should be moved. This will securely keep the wires together.
White to white and black to black are the proper connections for each wire.
If you choose not to utilize a fast disconnect, you may strip each wire and spin them together or use any union.
Reposition the light after inserting the wires back into the opening.
Conclusion
You've taken the first step toward being a responsible RVer by learning how to replace the ceiling light bulbs in an RV. All you need are a few simple tools, such as pliers or a screwdriver. Just take off the cover and the outdated light, then install the new one.