What are the lighting accessories? What are the lighting installation tools?
Lamp fittings are some accessories related to lamps, which are the fittings for the assembly and molding conditions of lamps. Normally, this kind of lamp fittings is an important part of installing and fixing lamps. So what are the lamp fittings? If you want to install, what are the lighting installation tools? Don't worry, Benwei will explain it to you, let's take a look.
What are the lighting accessories?
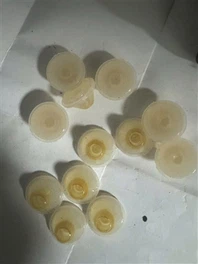
Light sources, terminals, sensors, converters, adapters, light boxes, inductive ballasts, electronic ballasts, acrylic accessories, plastic accessories, special lamps, filaments, electronic components, capacitors, brackets, hardware, ceramic parts, Plastic parts, glass parts, die casting parts, rectifiers, starters, transformers, voltage stabilizers, wires, sockets, plugs, switches, lamp holders, lamp holders, lamp panels, optical fibers, crystal parts, lamp tubes, lamp posts, lamp shades, Base, center pillar, bulb, ballast, bottom plate. According to different protection requirements, there are many small accessories. Such as rubber plugs, buckles, terminals, crimping buckles, pipe plugs, dental pipe screws, gaskets and so on.
What are the lighting installation tools?
1. First, prepare the following tools: ladder, screwdriver, pencil, impact drill, diagonal pliers, tape, etc. These tools must be used, and they must be prepared before installing the lamps. Now that the preparation tools are mentioned, the editor of Jiuzheng Lighting Network thinks it is necessary to briefly talk about the installation steps of the lamps, let's take a look.
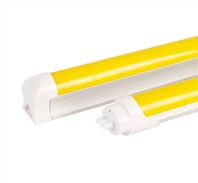
2. After the tools are ready, you can start to install the lamps, but the original lamps need to be removed before installing the lamps, and you must remember to cut off the lighting power in the room before disassembling.
3. After turning off the lighting power supply and removing the previous lamps, take out the new lamps you bought, determine the installation position on the wall, and use the prepared pencil to draw the punching position on the wall. If you follow a square lamp, you must pay attention to the level of the installation of the lamp, otherwise the effect will not be good after the installation is completed.
4. After the punching position is determined, punch a hole on the wall with a percussion drill, and plug the hole into the hole. It should be noted that when drilling with an impact drill, you must not drill too deep, nor should you drill too shallow. It is best if the depth is slightly longer than the riser plug.
5. After drilling the holes, you can first pass the power cords (live wire and neutral wire) on the wall from the inlet hole to the inside of the lamp, and then fix the lamp with the self-tapping thread in the packing box.
6. After the lamp is fixed, use diagonal pliers to strip the wire, then connect the live zero wire on the wall to the live zero wire on the lamp, and wrap it with insulating tape. It should be noted that the alternating current has no positive or negative and can be wired arbitrarily, but be sure not to short-circuit the live wire and the neutral wire.
7. After the wiring is connected, you can turn on the lighting power to see if the light fixtures just installed are glowing normally. As long as there is no problem with the wiring, the lamps can normally emit light under normal circumstances. There is no problem with lighting. Fix the lampshade, and the lamp is completed.
The above is the explanation of which lighting accessories are included and what are the problems of lighting installation tools. I believe you should have more understanding after reading it. The content is for your reference only, and I hope it can be helpful to you.